Well, this is pretty exciting. At least, it’s exciting if you have an Android phone – sorry iPhone users!. The newest version of the open-source camera app, MotionCam, now lets you shoot 10-Bit CinemaDNG RAW video files straight from your Android device. It should be noted that the feature is still experimental and definitely needs a few features tweaking and refining, but it works… with caveats.
The MotionCam software, as mentioned, is open source. It’s available in the Google Play store, but you can also always download and install the latest version from GitHub – and at the moment, you will need to go to GitHub to get the newest version with raw video capability. Here’s a sample recording using the new CinemaDNG raw video feature of the app.


[embedded content]
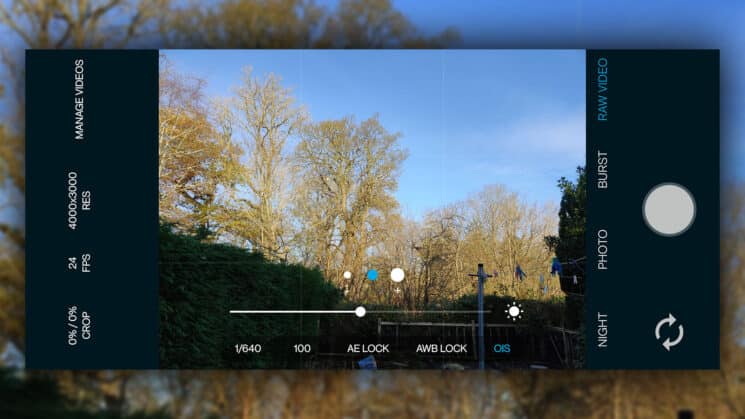
Now for the big caveat. To shoot 10-Bit CinemaDNG RAW video from your smartphone, you need a pretty powerful device. I’ve been testing the app this afternoon with my OnePlus 7 Pro, which is only a couple of year old flagship smartphone and it was struggling when trying to shoot the phone’s maximum resolution (4,000×3,000 pixels) at 30fps. Dropping this down to 24fps solved the problem – which is great for me because I shoot all my video at 24p.
Another alternative, which allows you to speed up the frame rate is to crop the image to a lower resolution. The benefits of 4,000×3,000 pixels for a 4K UHD timeline are obvious. You get a little more wiggle room for stabilisation in post as well as shifting your composition or keyframing movement. But you can crop that resolution down to regular 4K UHD at 3840×2160 resolution if you wish to create smaller files.
That’s probably the biggest hurdle with shooting raw video on a smartphone – especially with CinemaDNG. The size of the files. For a start, your device needs storage fast enough to be able to write them out without dropping frames and you need a large enough storage capacity to be able to save them. For example, a 15-second 3840×210 sequence at 24fps equates to about 2.25GB. That can fill up your internal storage really quickly.
You can get around that problem a couple of ways. Firstly, you can check out my review of the OWC Envoy Pro Elektron SSD. Obviously, you don’t need the hub and the card reader, but you can plug the SSD into your smartphone’s Type-C socket to unload the footage and delete it from your phone to free the space back up. And if you’re shooting a lot of video, that’s something you’ll need to do quite often.
The app itself, though, is fairly intuitive to shoot with. You can lock the auto-exposure or dial it in manually and you can also lock the auto white balance. So, if you want white balance consistency, you can point it at a grey card, lock it, move the grey card out of the way and then shoot. Of course, you’re shooting raw, so you can always tweak the white balance in post easily without losing data.
You can enable or disable optical image stabilisation for smartphones with cameras that support it and you can also choose between all of the cameras on your device. The app had no problem letting me choose between the three wide-angle, regular and telephoto cameras on the rear of my smartphone and I could even flip it around to the popup front camera. Yup, that’s write, 10-Bit CinemaDNG RAW selfie videos.
You can see in the screenshots above that the resolution changed depending on the camera I was using, so if you want consistent 3840×2160 resolutions from each, you’ll need to tweak your crop scaling. One mildly annoying thing about the cropping is that you don’t actually see where the crop lines are, so you have to guess. Hopefully, an overlay can be added to a future version to make it more obvious which part of the frame you’re capturing – and if we can crop by specific pixel resolution rather than as a percentage of the current resolution, that would also be amazing.
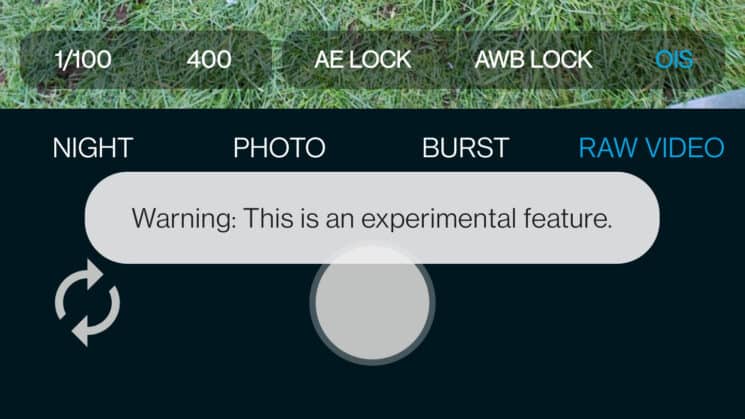
As I said, it’s an experimental feature that still needs some tweaking and refining. And the app tells you that as soon as you fire up the app and switch into Raw Video mode. So, be warned.

But for a completely free and open-source app, it’s pretty spectacular.
Aside from requiring a fairly high-end Android device for this feature to work, there is one other caveat. No audio is recorded along with your video. It’s a shame, but it’s understandable. The power needed to process and write out the raw data is already pretty intense. To be able to save out audio as well is probably a bit much right now. Maybe we’ll see that come at some point in the future, but for now, you’re going to need to try to sync up with separately recorded audio in post – or just shoot b-roll that doesn’t need sound.
For an in-depth look at how the app works and how you can start shooting CinemaDNG RAW video with your Android device, have a watch of this video from Patrick Levar.


[embedded content]
You should be able to edit the footage in any editing application that supports CinemaDNG RAW files (or individual files in Lightroom, Camera Raw, Capture One, etc). If you’re editing with the free version of DaVinci Resolve, though, you’ll want to limit your export resolution as it won’t let you edit higher than 3840×2160 unless you have the paid DaVinci Resolve Studio version.
I’ll definitely be having more of a play with this in the coming weeks and months as the feature is further developed.
To download the latest MotionCam and take it for a spin yourself, head on over to GitHub.


Recent Comments